
We decided to try to tell you about the creation of a complex font family at independent font foundry. We hope you enjoy our story and discover something interesting and new.
Introduction
Based on the positive experience in creating typefaces such as TT Norms® Pro and TT Commons™, we once came up with the ambitious idea of trying to create the perfect typeface to work in modern interfaces on most known mobile and web platforms.
It should have the best proportions in the category, as well as a wide palette of styles, characters and OpenType features. The typeface should fit well in the layout when replacing the old interface font with our new typeface. We have defined the number of styles that should be included in the font family as “optimally maximum.” Separately for programmers, we decided to make a monospaced version of the typeface with 4 styles (the so-called “Golden Four”), which is based on the original font. It’s good when you have such a consonant pair of typefaces.
This typeface should become a universal and convenient tool for designers who actively use interface fonts in their projects. And also, let’s not forget about the creative component of the project — the typeface should be beautiful, elegant and at the same time invisible and neutral. From the technical point of view, this typeface should be perfect, have the most modern hinting, as well as a variable version for those who are well versed in the subject. So, this is the beginning of the story of the project that lasted for more than one calendar year.
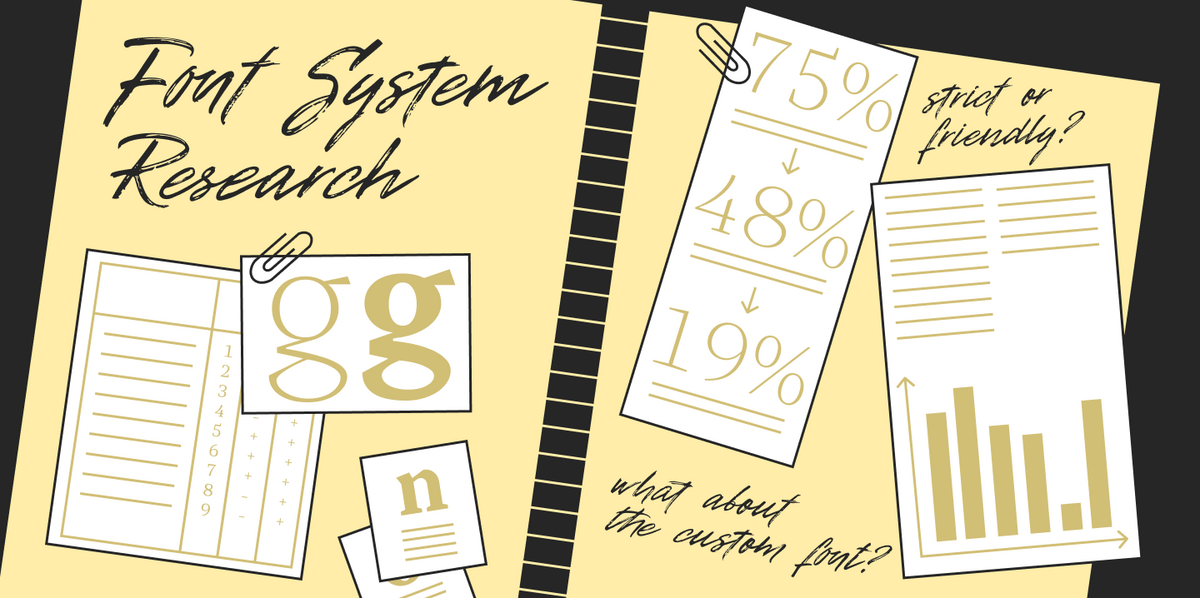
Stage 1 — Research
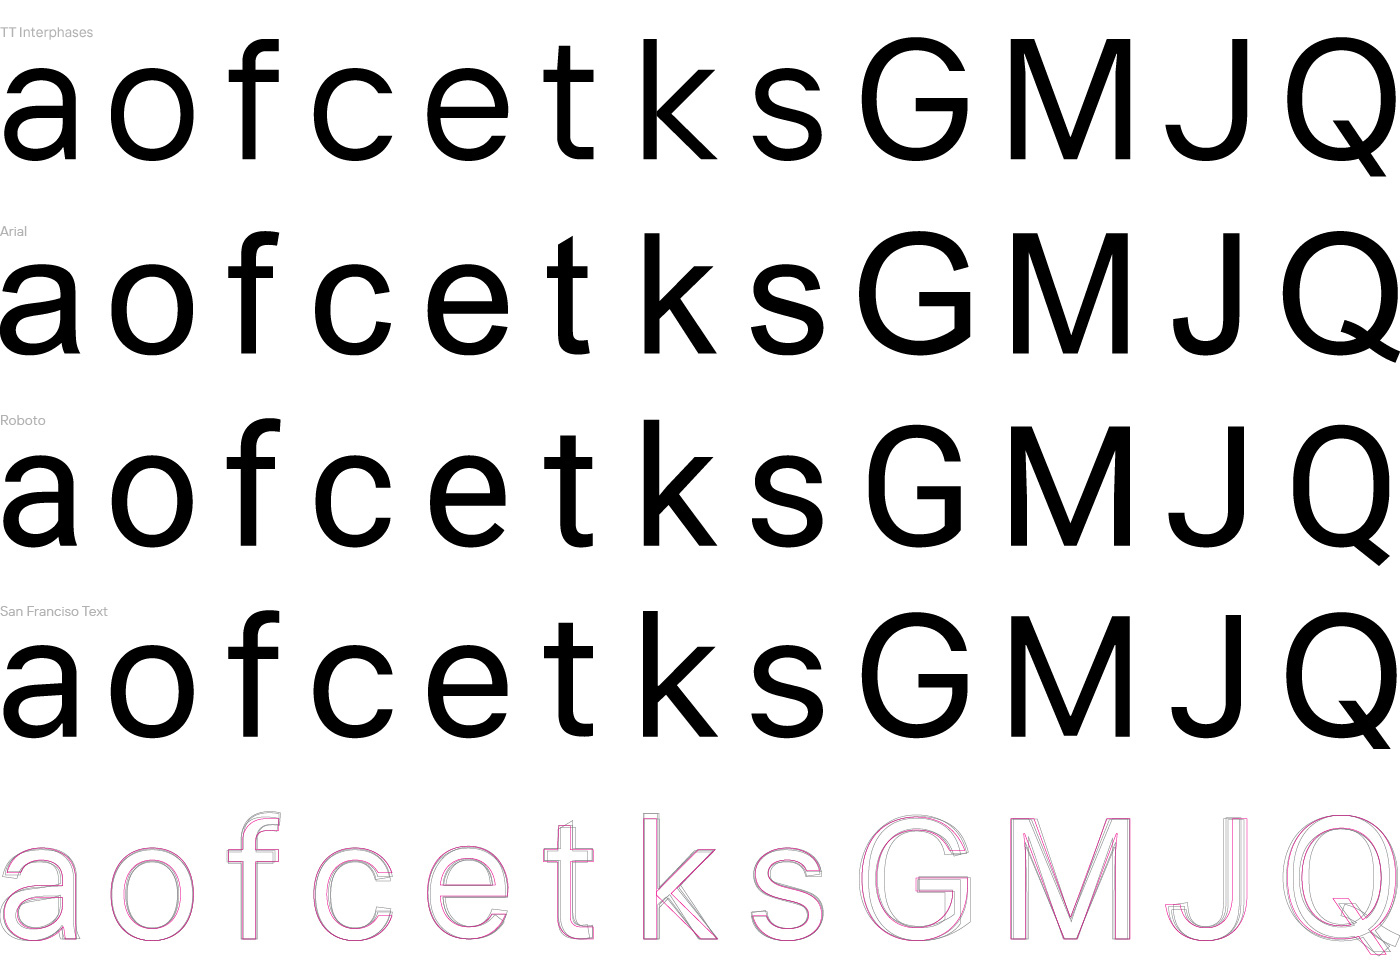
We have thoroughly approached the process. All the most popular typefaces that are commonly used in interfaces were considered, they were all classified, divided into groups and analyzed.
The result of these summary data is a large presentation, in which we tried to analyze and identify the main features in the construction of characters, such as the degree of closedness/openness of the aperture in “a”, “c”, and “e” characters; the degree of roundness/squareness of circles in round characters; shapes of dots and commas, as well as of other similar elements; conditionally open and conditionally closed forms of some figures, such as 4, 6, 9. At a general meeting, we discussed and decided on the direction of further work.
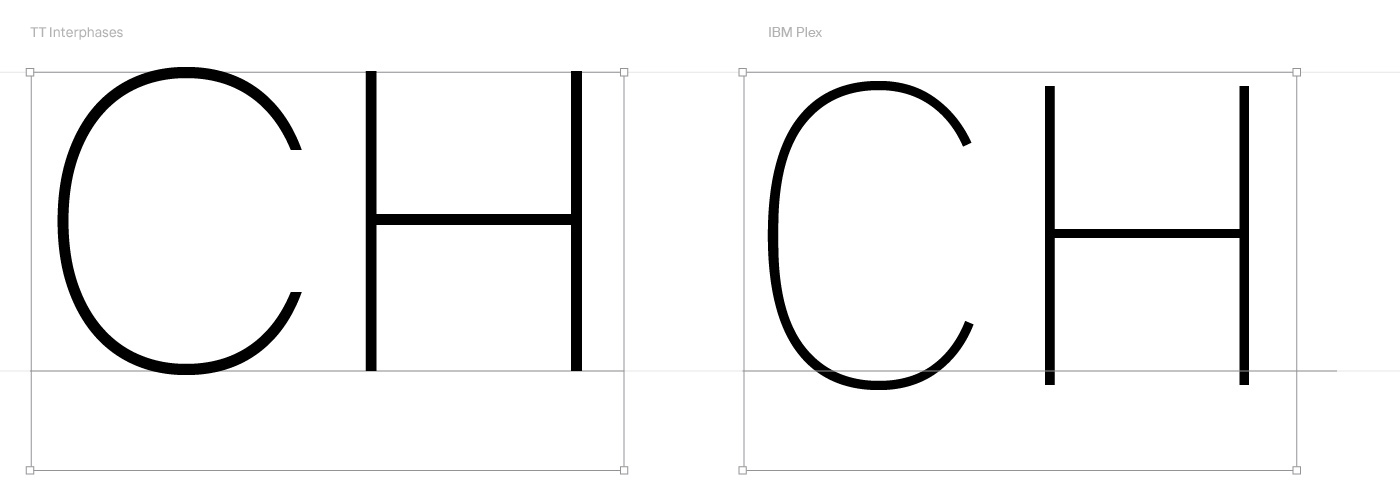
We could not ignore the already created and actively used fonts, so we calculated the proportions of all popular typefaces from this category and through this analysis, we came to our own conclusions and proportions. Now we can be unafraid of the “layout sliding away on the two hundred already drawn screens” when a designer replaces the font in previously made layouts, or that the degree of blackness of in the type of a similar style will change dramatically, because thanks to the detailed analysis, “weights” will be close to competitors.
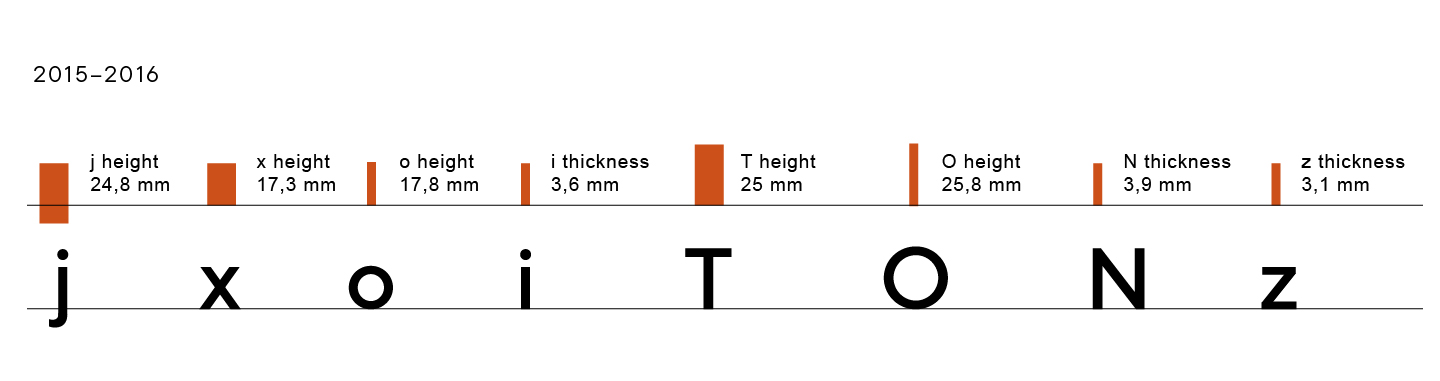
We measured in arbitrary font units such parameters such as the x-height, the H-weight for uppercase characters, the thickness of the H-stem, the thickness of the H-crossbar, and similar parameters for the lowercase characters. As a result, it turned out that most fonts are very similar to each other, and some are completely identical in many respects.
We also measured the differences in the sizes of vertical strokes of different styles within the same typeface and they also turned out to be close to each other and were mainly performed according taking into account Pablo Impallari’s formula, in which the increase of black in the styles is carried out as harmoniously as possible (in light faces, the increase of black is carried out quickly, in bold faces, the increase of black is slow).
We also do not forget about our beloved customers, colleagues, and friends. We decide to conduct a quantitative marketing study. To do this, we formed an online questionnaire about interface fonts used by our large IT giants as well as the leading digital agencies of the country. As a result, we received more than 50 responses with detailed information, which prompted us to further think about the font composition and the nuances of the nature of the typeface we create.
Stage 2 — Drawing the basic face
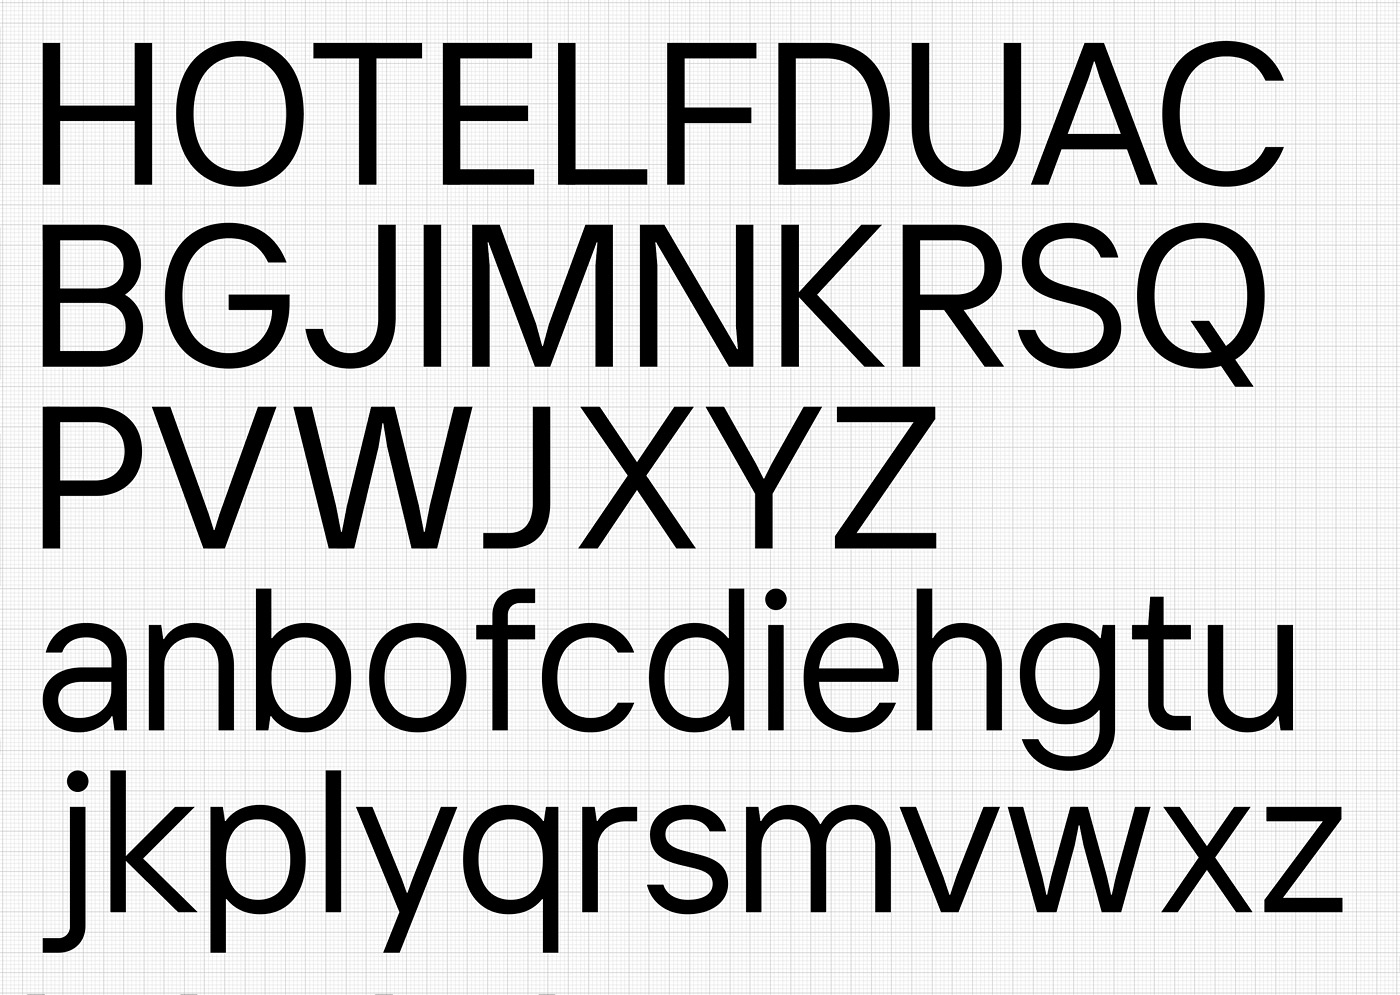
After confirming all the basic proportions of the font, as well as clarifying all the nuances related to the forms of the font’s characters, we proceeded to draw the main characters of the regular face to test our hypotheses. We have first approached the font in a 5×5 grid of font units. The first face included all the style — forming elements of the font.
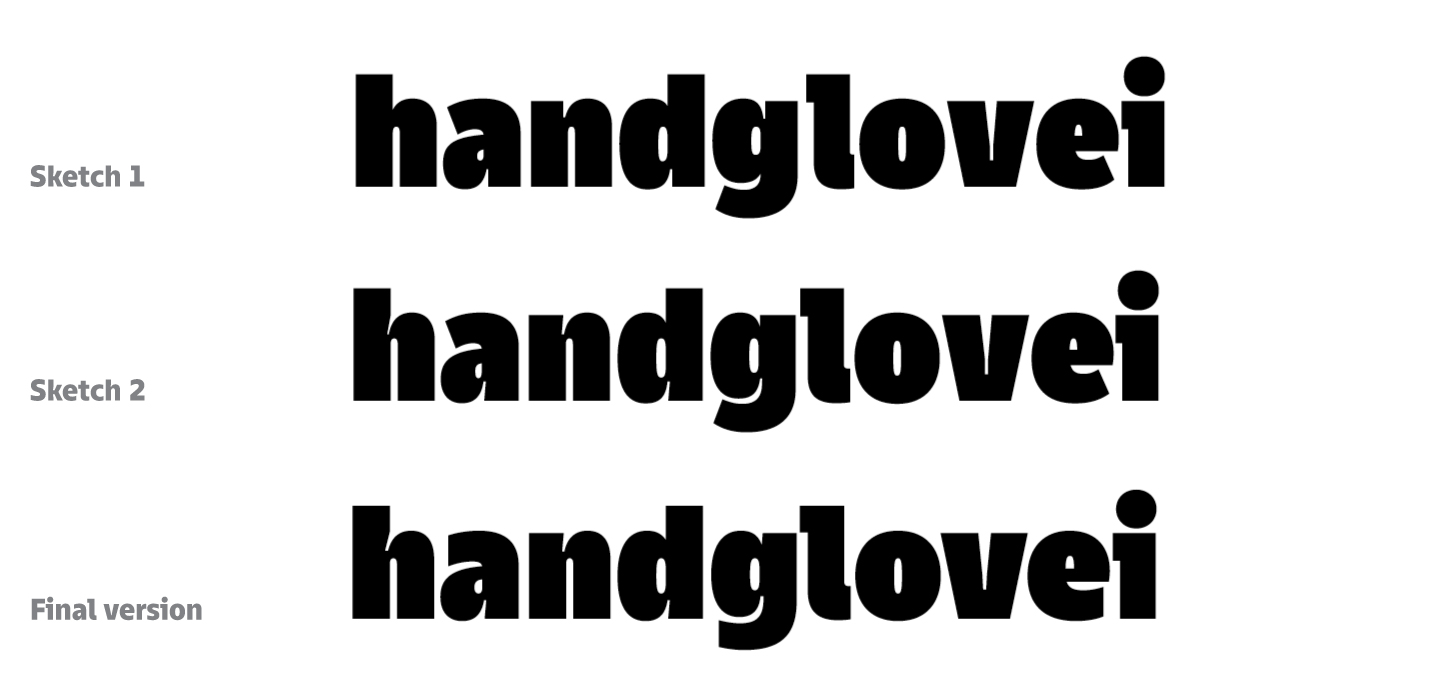
During the collective discussion of the project, a hypothesis was put forward that the shapes of the circles turned out too simple, so two modification attempts were made to diversify them. The first attempt was to make them more “square-like” and the second was to add straight lines on the vertical strokes and to look at the result.
In the picture below you can see three circle shapes for the font in the same text arrays: the first (upper) option is the basic circle shape implemented in the first font iteration, the second (middle) option shows each oval element squared on each bend by 10 font units, and the third (lower) option is the version of ovals with straight distances, the inserts into the vertical strokes of the ovals.
As a result, we conclude that the first option is the most optimal and best fits the character and functional tasks of the font.
Indeed, the “neutrality” is now our friend and school sweetheart. And now our font department is faced with the task of introducing an individual touch into the font. When drawing the font, we try to be as original as possible — we must be conquistadors and in no case resort to repetition.
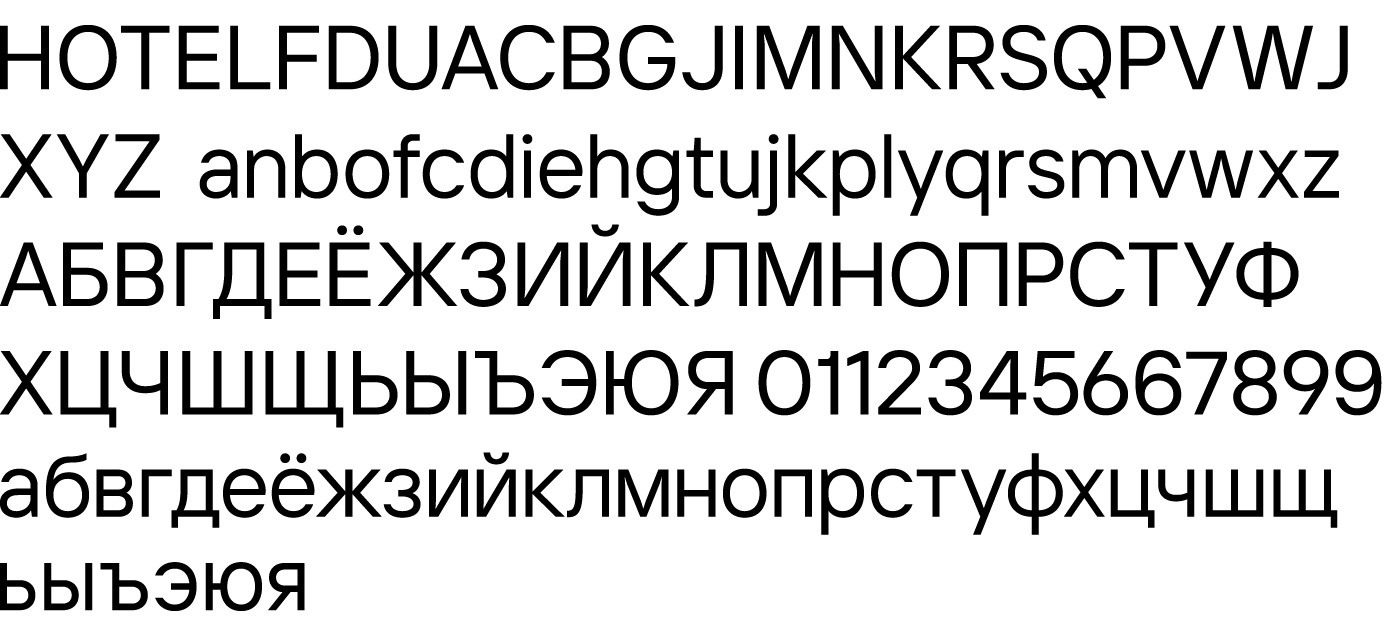
The final font composition after the first iteration of font drawing is ready. Latin and Cyrillic look consistent. Geometric and humanist motifs are organically and harmoniously interwoven in the font. The font has its own character, which is manifested in small nuances and elaborate details. All well-measured proportions correspond to our high requirements, which were put forward by research and detailed analysis of all interface fonts, as well as the results of a survey of our colleagues, clients, and friends.
Stage 3 — Drawing all the faces of the basic family
So begins the most interesting and difficult stage of the font family — creating the first working font, further expansion to a font family, writing of OpenType features, creating kerning, as well as numerous tests.
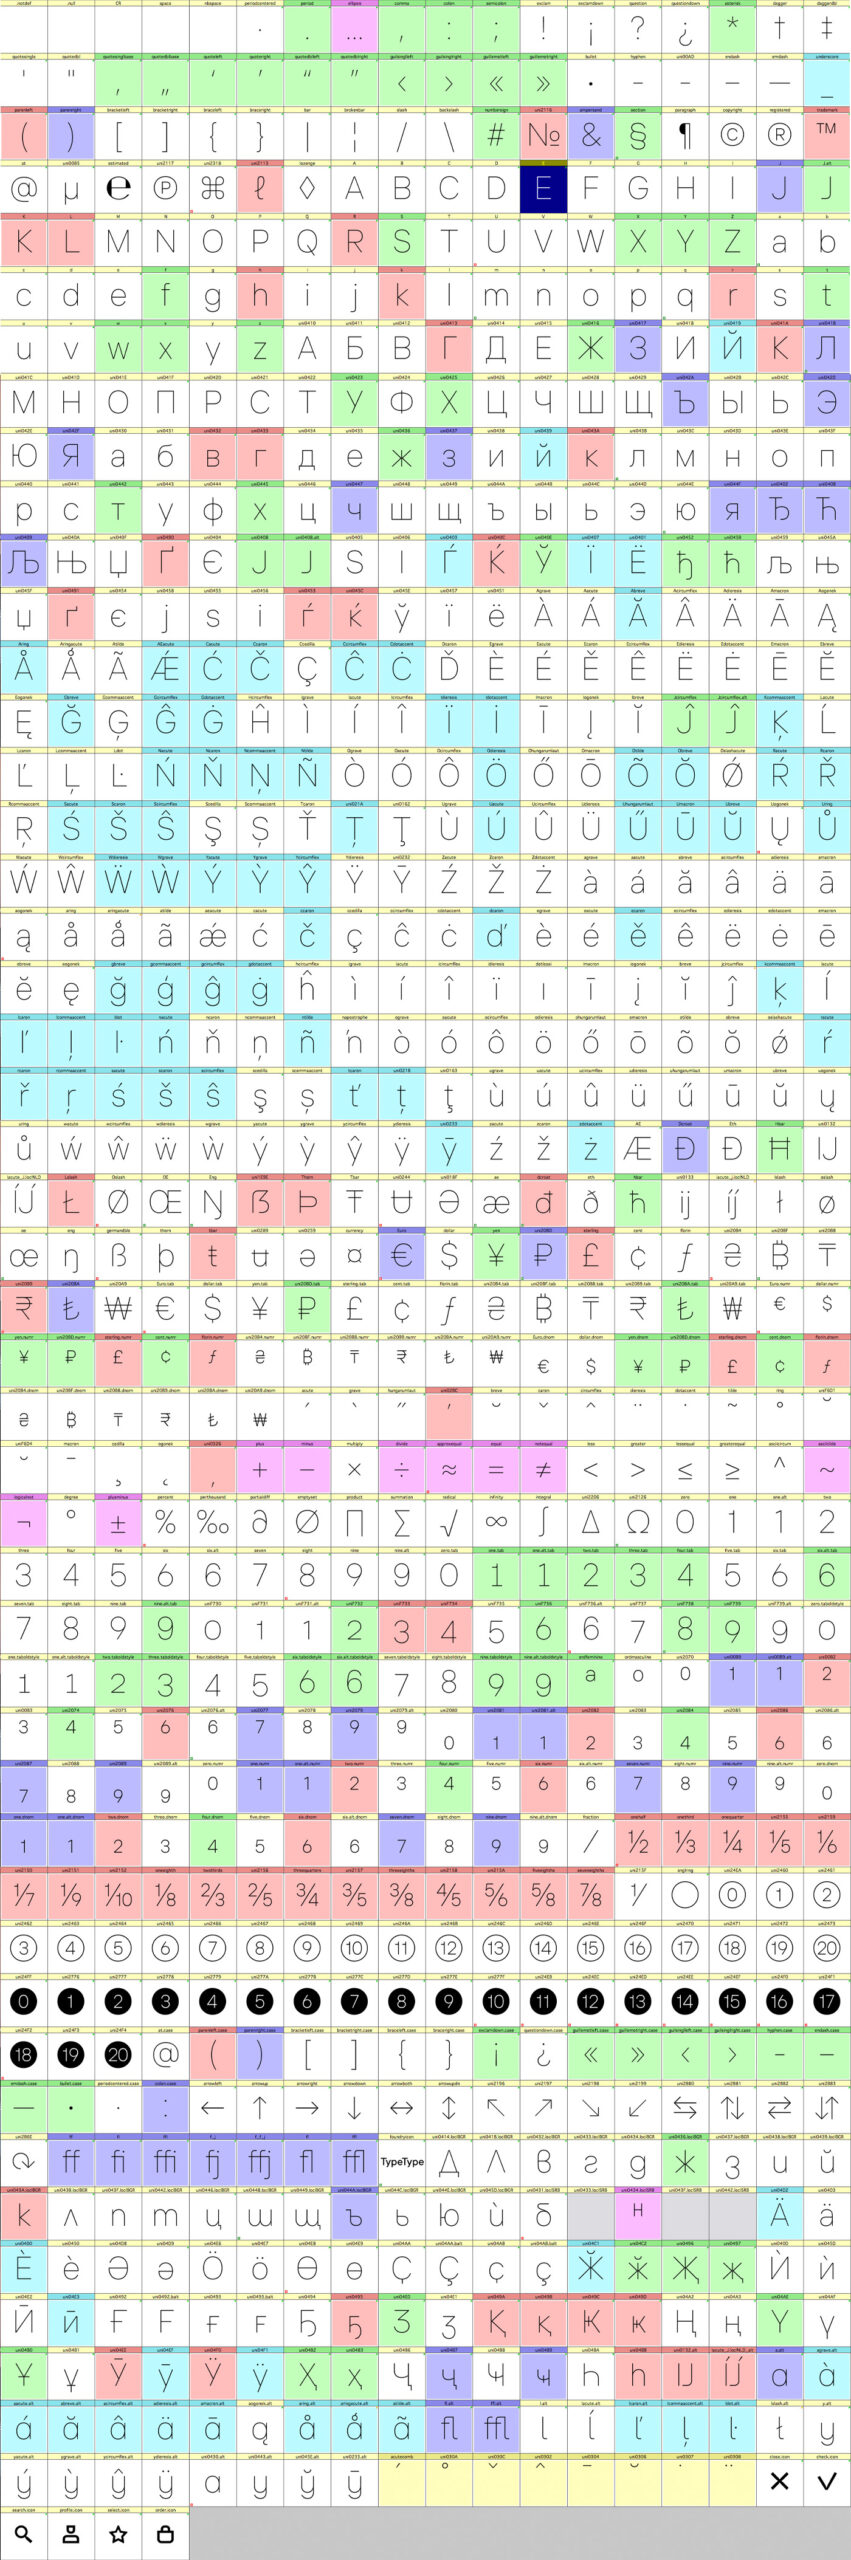
We determine the character composition of the font and create an individual encoding for the typeface. Each style in the family must have the main special characters, figures, basic Cyrillic and basic Latin alphabets. But it’s very important for designers to have a multifunctional tool in their work, so we decide to significantly expand the character chart by introducing into it:
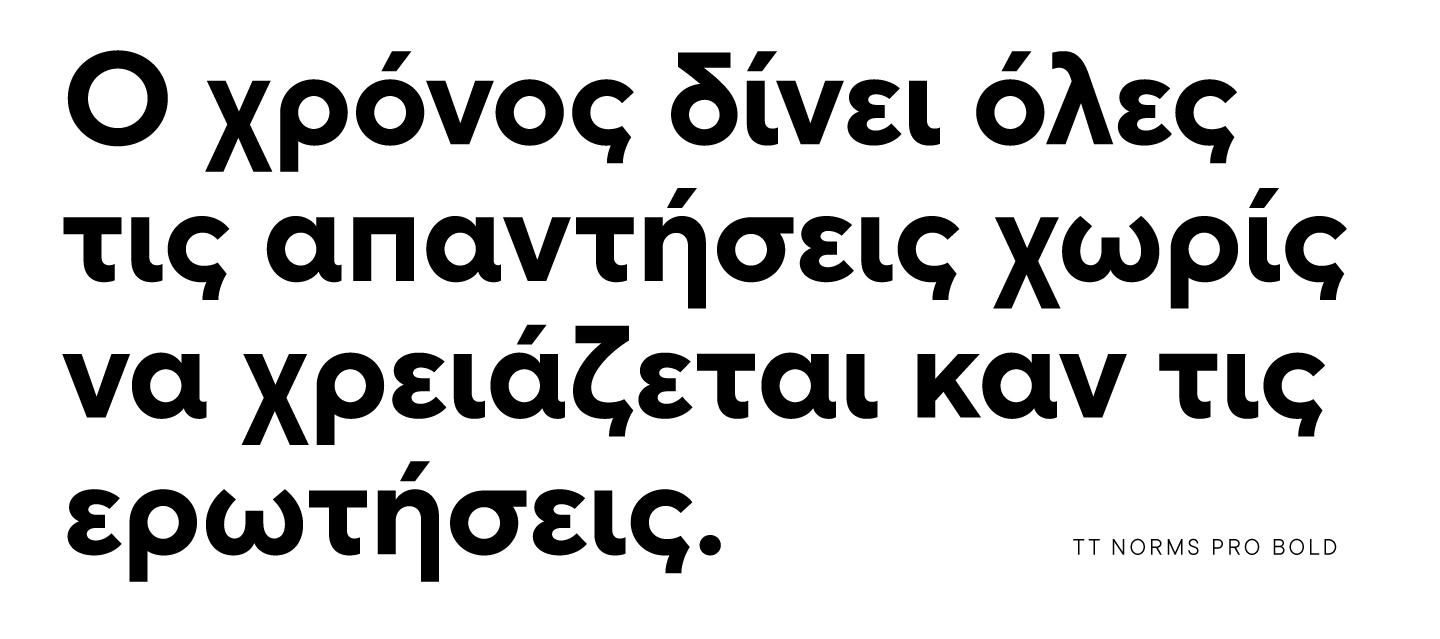
a) Extended Latin support (Greek and Vietnamese languages will appear a bit later)
b) Extended Cyrillic support
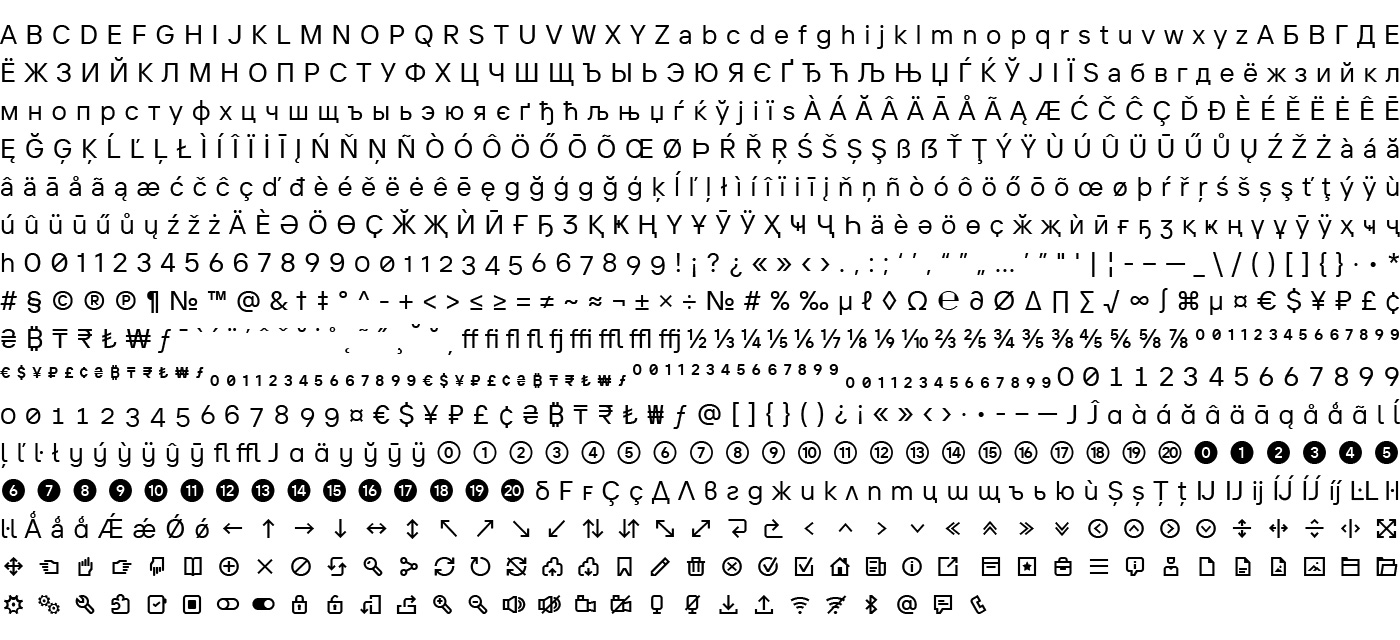
c) A large block for numerals (lining figures, old-style figures, their tabular versions, as well as various superscripts, numerators, denominators, and inferiors). For all types of figures, alternative versions are provided for 0 (the alternative form with strikethrough), 1 (stylistic alternate with a ductal character), 6 and 9 (alternative closed forms of numbers).
d) An extended block with currency signs (including regular versions of characters, tabular versions of currencies, as well as currency versions for numerators and denominators).
e) Rational numbers in the form of an expanded palette of auxiliary fractions, as well as figures for numbered lists, framed in circles of two types: with and without filling (the so-called “billiard balls”).
f) Special versions of special characters for use with uppercase characters (Case Sensitive feature).
g) Alternative forms for some lowercase characters, giving the font a softer ductal character.
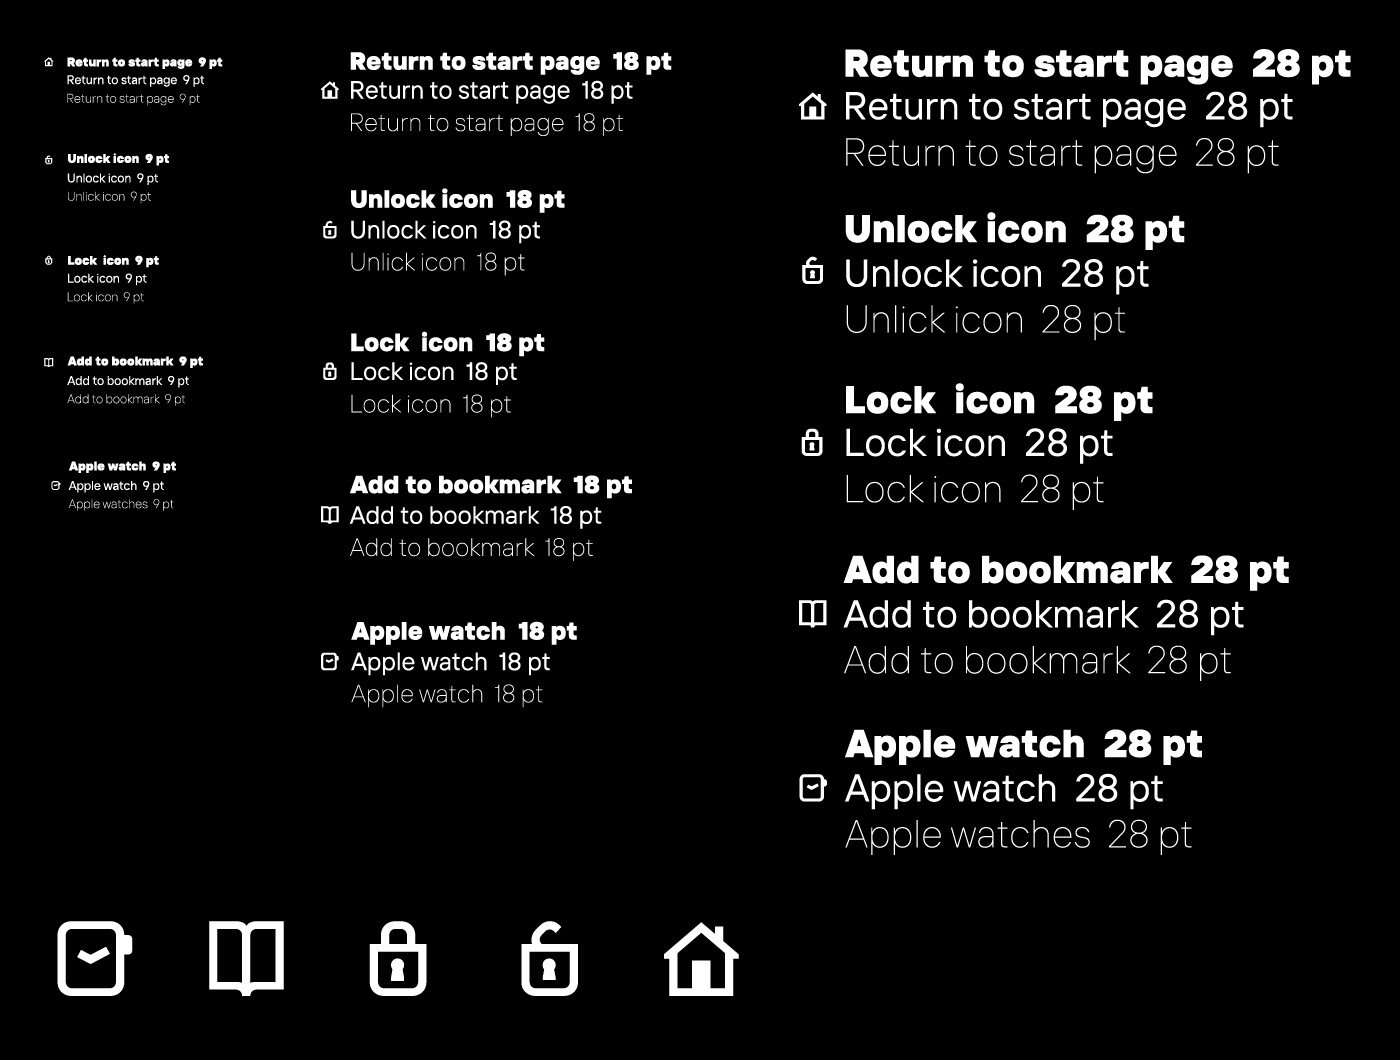
h) A set of icons especially drawn in the style of the font thought out for use in various interface environments.
We now go to the font editor and transfer all the characters drawn in the vector editor into the font. We draw the first batch of characters starting with the most complicated special characters and diacritics. We should always remember the rule — when changing the old interface font in the layout, everything should remain in the same place. Also, when drawing characters, we always keep in mind the “midline rule”, which became relevant when Sketch & Figma appeared. We must achieve such an effect that the midline between the upper and lower extension elements of our font is similar to that in other interface fonts. Otherwise, the text in the text blocks in modern interface editors will move up / down inside the text blocks and this will directly affect the layout. We keep this in mind when drawing characters and contours that exceed the line.

After the first iteration of drawing of all text and non-text characters, we get feedback from the art director of the project about the existing font pattern, as well as about the first text test strips of the text and its uniformity. A difficult but necessary decision is made — we get rid of the visual compensators and pacify the set. Our school sweetheart “neutrality” makes us bring everything to following a single logic and to consistency.
In parallel, we are working on two boundary styles: thin and black. A working group of three people is working on them, two designers and one technical manager. We draw and edit. Again, we draw and edit. In fact, this is a clear and streamlined technical process.
We should, perhaps, talk about this in more detail for the benefit of an inexperienced reader. There are two main tasks in this process. The first is that you need to fit into the conditional font width, for example, a thin font will appear to be the same width as a regular font only if it is physically narrower. The reverse logic is valid for bold fonts — we will get into the conditional width of a regular only if the bold style is physically wider.
The second task is to fit into the conditional height of lowercase regular-style characters. Due to the fact that the font is an optical construction, we increase the height of lowercase characters for the bold font by 20 font units, and in the thin face, we reduce it by 10 font units. Thus, all weights will now be consistent, and it will seem that this is the same font, only of different thicknesses.
With the first face, we get a clear understanding of how the characters relate to each other. Now, this is our starting point, we will focus on it when creating other styles. The letters H and O are used as a measuring ruler. When increasing or decreasing the weight in other styles, any character should change its proportions in the same way with respect to them.
You can follow the drawings of how characters change from style to style. Letters become bolder, but their proportions, pattern, and nature do not change. So, for example, “H” looks a bit narrowed and tall. “O” also tends to look like a rectangle rather than a square. Its vertices and turnings are not sharp, but also not clearly squared. The same type of turnings appears in “B”, visually it appears a little wider than “H” and slightly narrower than “O”. The horizontal line is slightly above the middle, approximately at the level of the middle stroke of “H”. We look at the ratio and proportions of the semi-ovals — all these details persist from style to style.
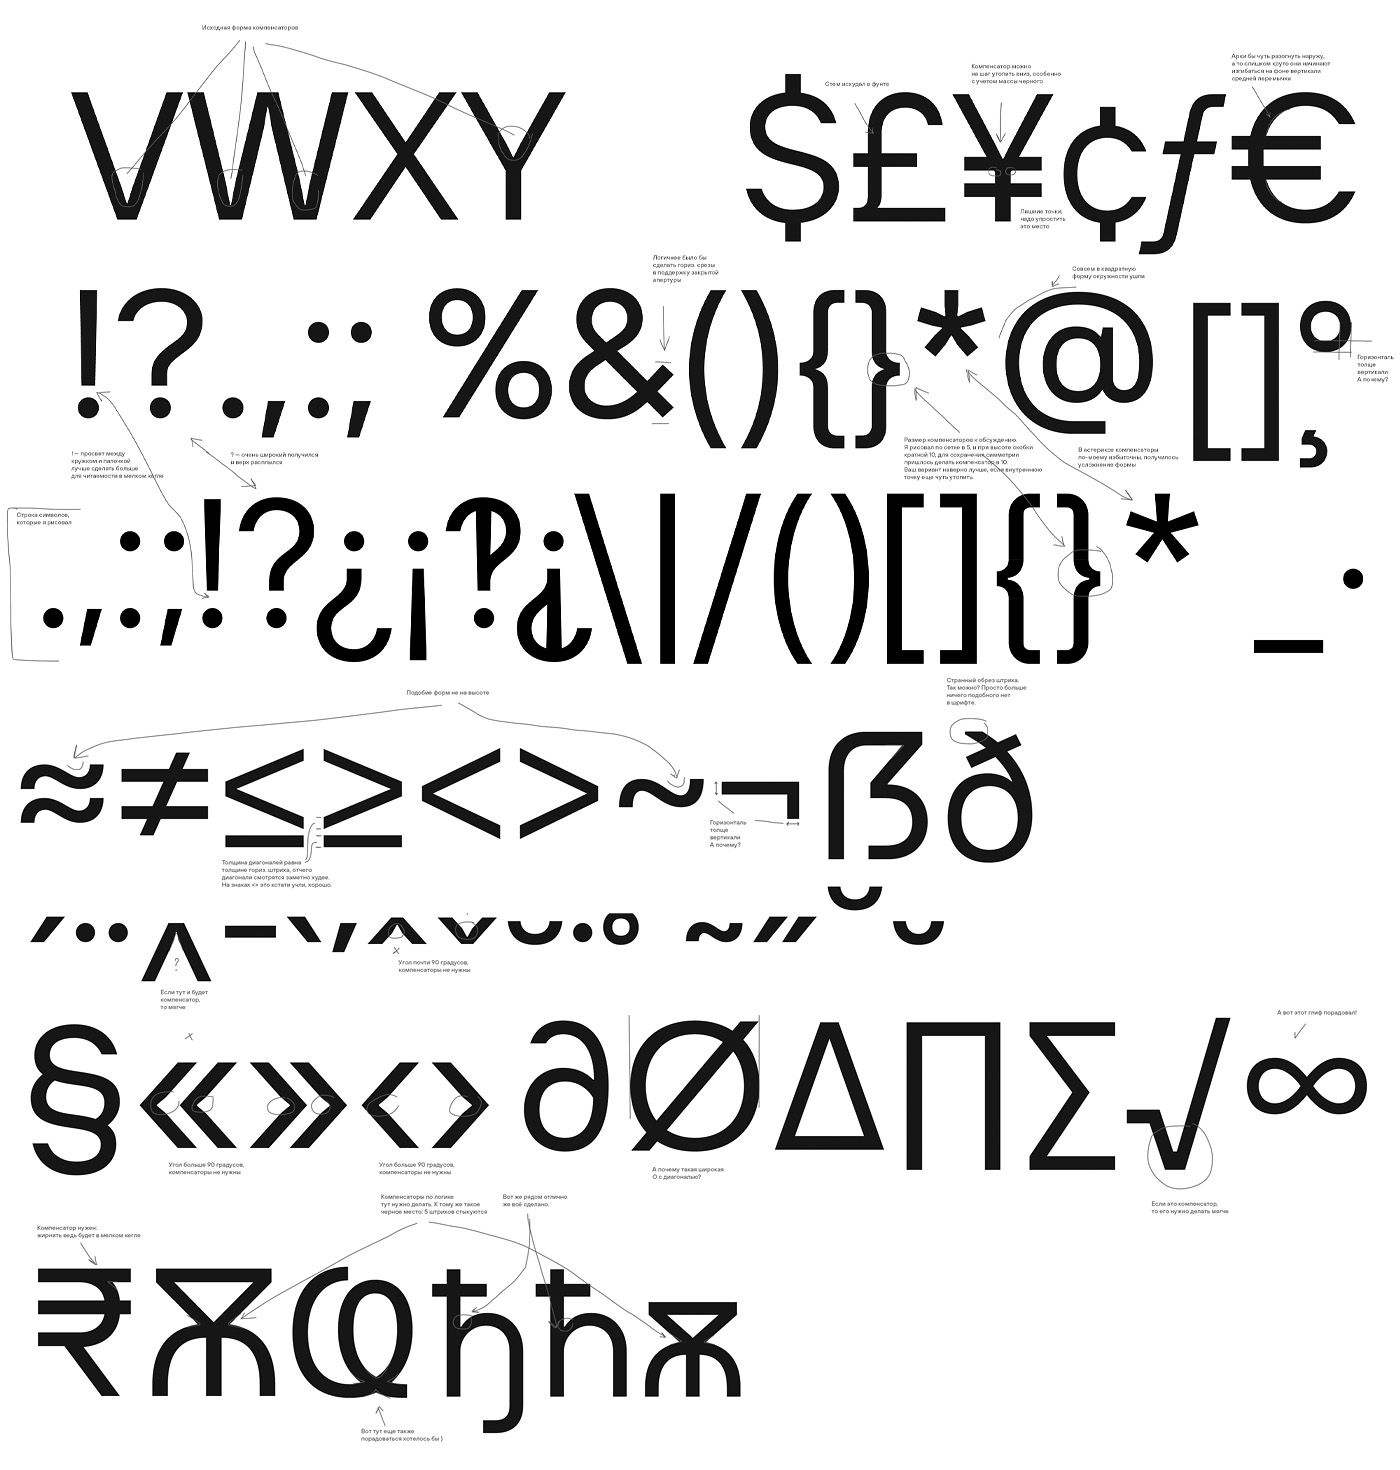
The most difficult face to create among the three basic weights is black. In order for black to visually correspond to the regular, the external proportions of the glyphs must be very much defined, we cannot make them three times wider, just to fit the very wide stems in each letter. We cannot reduce all-white space in a letter to zero either. Therefore, we have to resort to compensation due to the internal space of the character. Some glyphs can and will be simplified:
In others, we are looking for a balance by thinning the horizontals.

This work is done by hand for each character. Everything is very individual; you need to constantly look at the result so that there are no “stickings” or spots that are too bright.
The picture below shows the first iteration of drawing a thin style by a designer and the comments inserted into the font file and sent to him by the technical manager. Each color of the filling inside the font has its own meaning. Designers familiar with this logic will immediately realize what has been changed in the font.
After the first iteration, we manually reduce the height of lowercase characters by 10 font units.
At the office, the working group holds discussions on the need for compensators for the bold style, as well as the uniformity of the set for the Cyrillic alphabet and the Latin alphabet. We make the decision to get rid of compensators in the bold weight as well. Now we root for the clean forms and a single logic for construction of all signs.

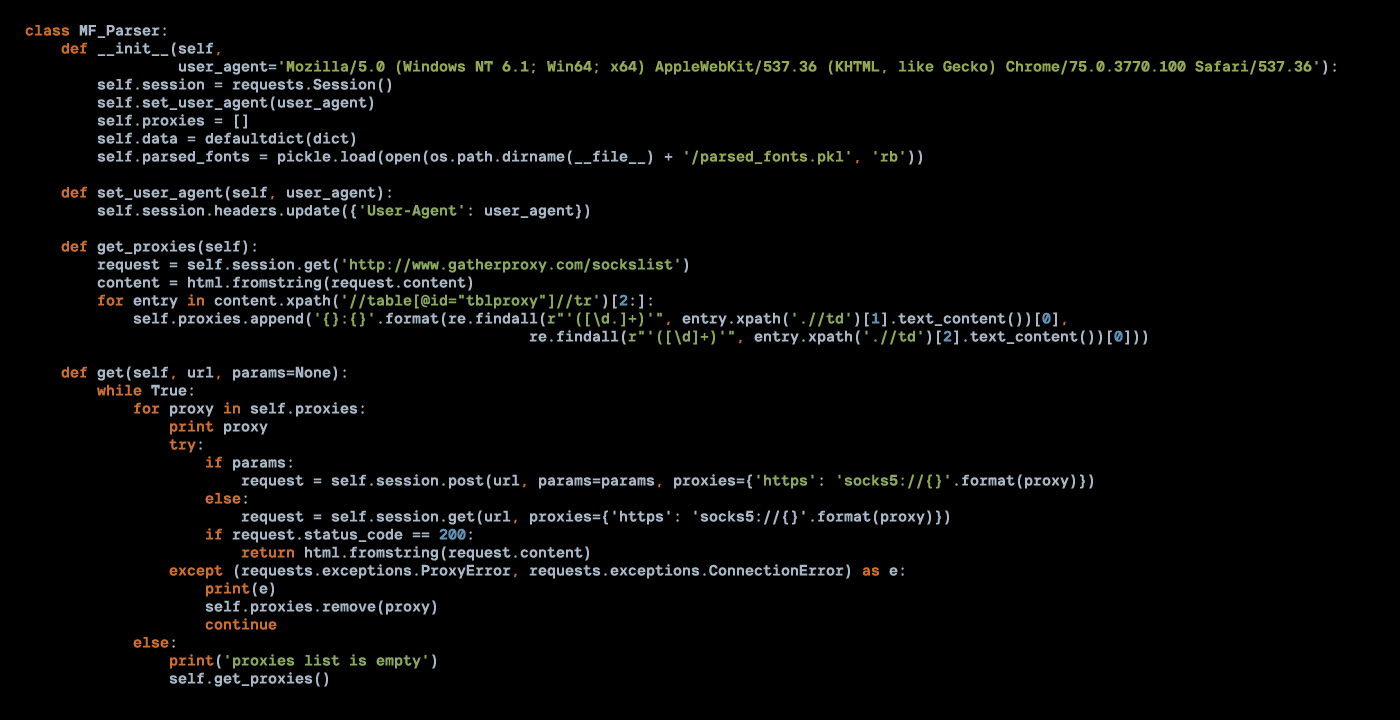
When creating a bold style, at the very last moment we suddenly saw that all the diacritics of lowercase letters are placed at a very close distance from the lowercase letters themselves. In order not to change it all manually, our programmer writes a special Python script, which will help instantly change 300+ characters, that is, to lift them up to the desired value and only for lowercase letters.
Lifting up the diacritical marks with a script
When the three main key weights (masters) are completely drawn, we begin to work on intermediate ones, which in fact are very accurate in interpolation. This is due to the accuracy of the original contours. Two engineers work on six intermediate styles bringing the contours to the perfect condition. We write up detailed specifications and send them to work.
The picture below shows the result of blending (averaging) the contours of the regular style and the font edited and completed by the engineer. As you can see, the difference is small.

Next, for all upright faces, the oblique versions, or Italics, are made. This is one of the most important, time-consuming, and at the same time “boring” stages. To create oblique shapes, we use the “half- tilt-half-turn” method. In fact, these are the so-called “Oblique” fonts, and not the true “Italic” ones, that is, the tilted upright versions without changes to the shapes of the characters themselves. Half-tilt-half-turn is a method that avoids suppressing deformations in circles.
At the office, we create 5 anchor weights, write up the documentation for the styles we made to give to the engineers involved in the project, and send the remaining fonts to work. Documentation is a very important stage in the creation of each typeface at some stages of the project, as it allows you to unify the process of creating a typeface by different people.
Parallel to the creation of intermediate weights, as well as the creation of obliques, we proceed to the technical part of the project, namely kerning and OpenType features, as well as detailed adjustment of the line spacing. We make kerning inside the font “unified”, that is, we create a single set of kerning pairs and kerning classes for all styles. Even within our team, there are different opinions about unified kerning — some are for, some are against it.
However, if in the creation of kerning we take into account physically different spacing in fonts of different weights (in a thin style there will be a significantly larger spacing than in a regular and especially so in a bold), as well as the difference in white in triangular character fits (diagonals in characters like A, X, V and the like may change their angle, depending on the weight of the font; accordingly, the required degree of compensation in the form of kerning pairs will also change), it is possible to make a kerning that fits perfectly to the three extreme cases, and consequently for all intermediate font counterparts as well. In total, we get 1167 unique manually selected pairs.
As a separate part, we create special kerning pairs for some characters, which can be combined with space in order to align text sets as beautifully as possible. For example, if you type “Y” and space, then together with space such a combination creates a real chasm, which will be visually perceived as a double space. We compensate for such gaps with a kerning pair.
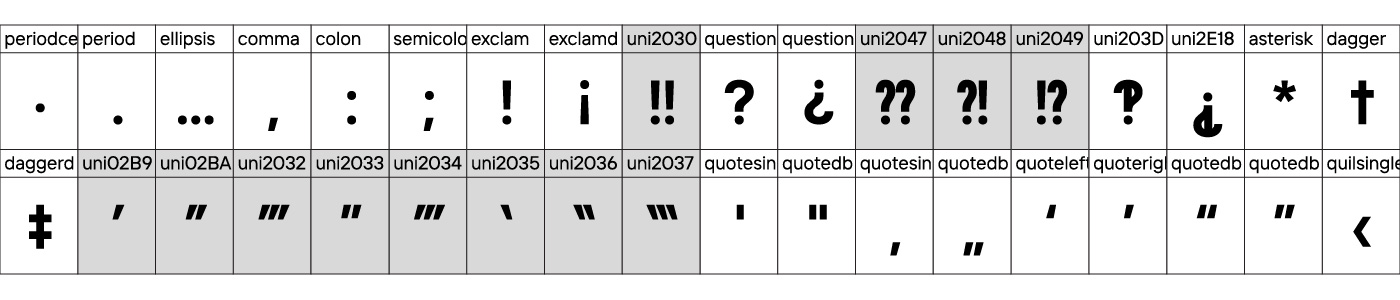
Let’s talk a little about the OpenType features in the typeface. In fact, this is the part of the work of type designers, which almost always remains behind the scenes for font users. The typeface TT Interphases have of such 32 features. We will talk only about some of them, and you can learn more details about the features included in the typeface from the detailed font specimen .
a) Few people know that in most modern fonts there is a unique option to replace figures typed around a slash with a fraction. This feature is called Frac (fraction) and works as follows: you type 1/2, and at the output, you see a compact beautiful fraction.
b) For cases of use of brackets and quotation marks with uppercase characters, there is a feature called Case (Case sensitive). It allows you to “raise” some special characters for a harmonious combination with uppercase characters.

c) Sometimes there are cases when tabular numbers and currency signs are needed. This is very convenient if you need to type them in a column so that one digit is placed exactly under the other. For such cases, a separate set of characters is drawn, in which the widths of all the em-squares of the characters are equal to each other. With this, the typeset ceases to be smooth for the sake of functionality and becomes a little more spaced. This feature is called TNUM (tabular figures), and for it, we draw not only figures but also currency signs.

d) For some fonts where it is necessary to distinguish “Zero” from the capital letter “O”, the Zero (slashed zero) feature is used. This font was no exception. All possible zeros in the font have alternative versions with a slash inside the oval.

As a matter of fact, we added a lot of useful OpenType features to the typeface, such as salt, ordn, ccmp, sups, sinf, numr, dnom, tnum, pnum, onum, lnum, liga, dlig, calt, ss01, ss02, ss03, ss04, ss05, ss06, ss07, ss08, ss09, ss10, ss11, ss12, ss13, ss14, locl . All of them are described in the specification of the font family (available at the link). Through the use of individual features or combining them with each other, you can unrecognizably change the “voice” of the font.
All features are tested and verified in the most various and possible combinations; we also check the functionality of the features in various programs.
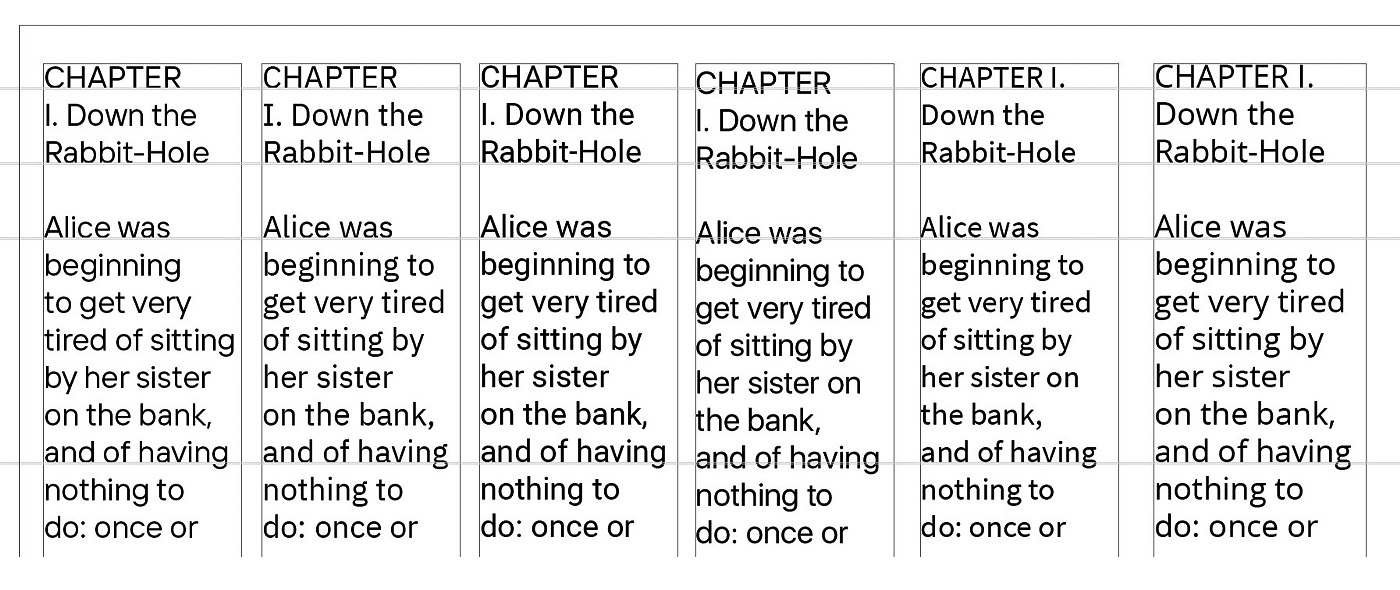
In order to make the layout of text blocks as convenient as possible for interface designers, we study the most popular and high-demand interface fonts and their technical parameters that affect the line spacing (first of all such as Ascender, Descender, and Gap (forced white section between lines). Based on our research, we create a single summary table, based on which we derive our own values.
After the first comparison test of text blocks of different volumes in the layout, it becomes clear that the line spacing is close to perfect, but the text box a little higher than needed. We do not like it because we need to be perfect.
We decide to reduce the size of the ascender and increase the size of the gap and so we get the required line spacing. The set is now aligned for almost all compared fonts.
Stage 4 — Creating Icons
In parallel with working on the main font, we think about how to draw a set of icons for it. The first approach is unsuccessful since the task was poorly formulated and insufficiently detailed.
We delve into studying the existing types of icons, analyze existing styles and in the end, we draw up a technical task for the icons designer.
It turns out that there are very few good informative icons for our functionality: as a rule, these are separate vector sets (and they are not in the fonts). We study what is out there (separate icon sets for Laptop / Desktop / Phone), they contain the same icons, but there are specific ones that are used exclusively on a given type of device. We also looked at the icons in different operating systems — Windows, Android, macOS.
We analyzed and made an “averaged” = universal set of icons. The icons were divided into 5 groups (main actions, states, sections of the site, documents and folders, mobile interface) depending on the objects and actions.
At the first stage of the work, it was important to understand how the icons and font can be reconciled, to create a unity in the sketch that would be not only due to the thickness of the lines, but also thanks to the consistency of the outline of the icons and letters.
We get a sketch of the first icons and consider them in different sizes and on different backgrounds. We edit them so that they fit stylistically well with the typeface (for example, the shape of turnings and the end of strokes). We look at the balance of black and white, so that black and thin weights look harmonious with each other, and we introduce small fills of black color in some icons.
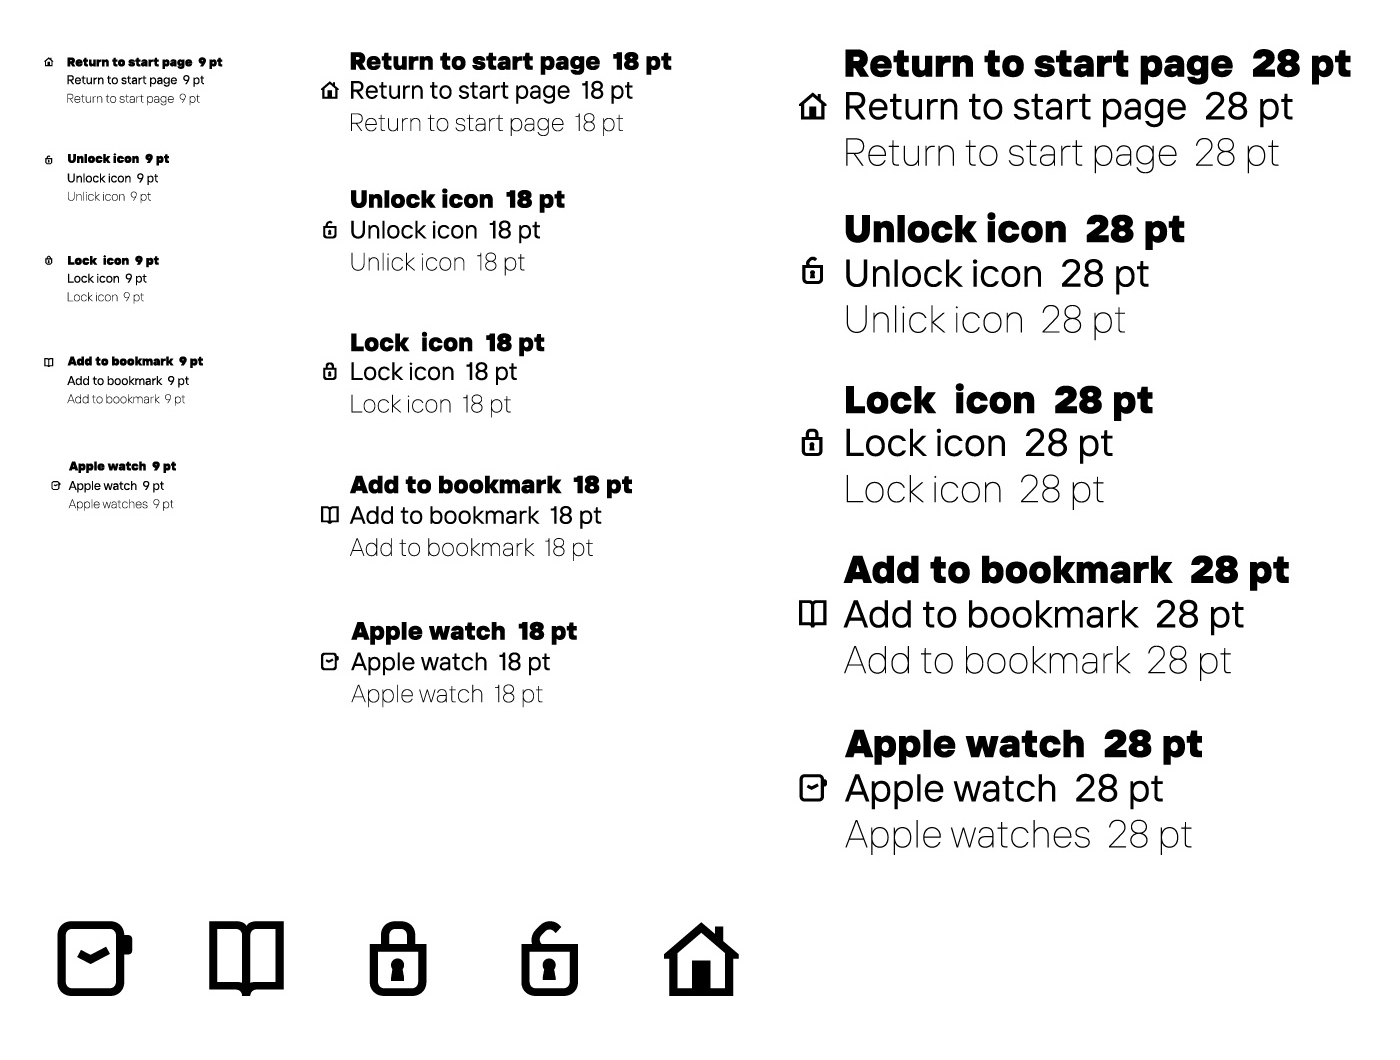
At this stage of work on icons, when there already was the elaborated technical specification and the understanding of the main set of icons, the question arose of how far we could deviate from generally accepted images. During the discussions, we came to the conclusion that it is necessary to preserve the established images, but some icons can be updated, for example, the clock.
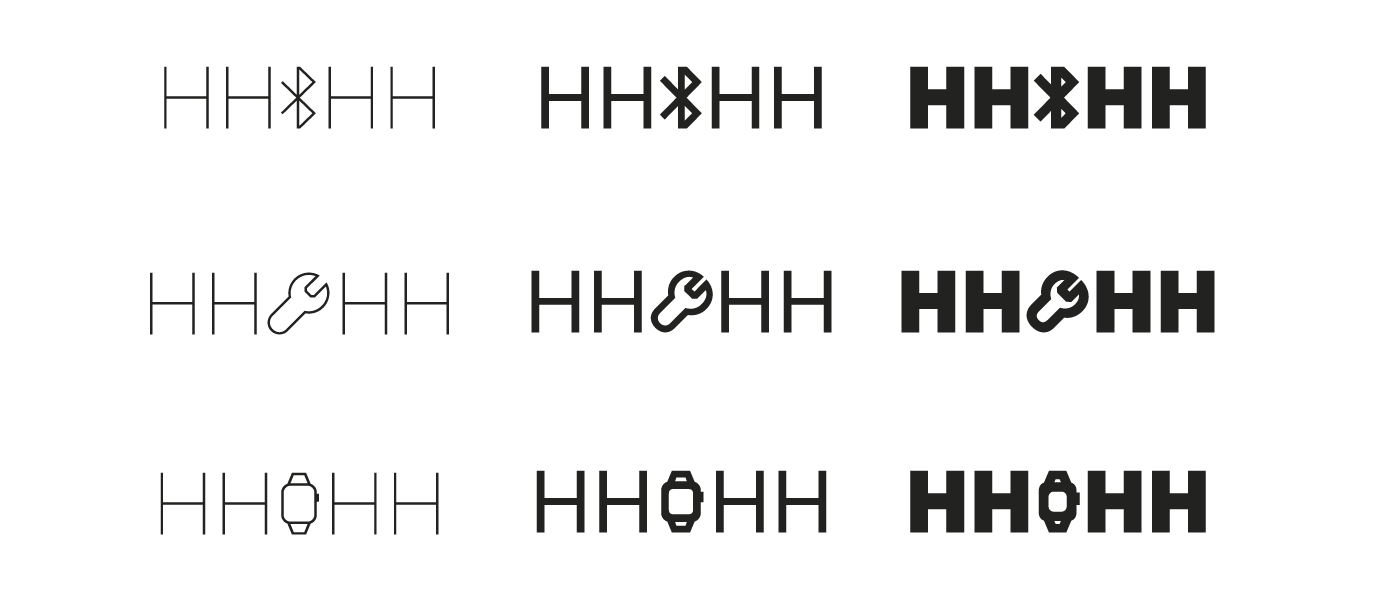
We draw the entire set of icons for three main styles, edit and amend it again, and so we get a large canvas of icons for the three masters (thin, regular, black), and then we will get icons for all 9 upright styles.
The Icons are part of the font, which means they must change their saturation in the same proportions in which each style changes, too. In researching this issue, we found out that the thickness of the main icons will be defined not by the stems of uppercase characters but by the stems of special characters. icons change their weight within the font logic while maintaining readability without sticking in bold styles.
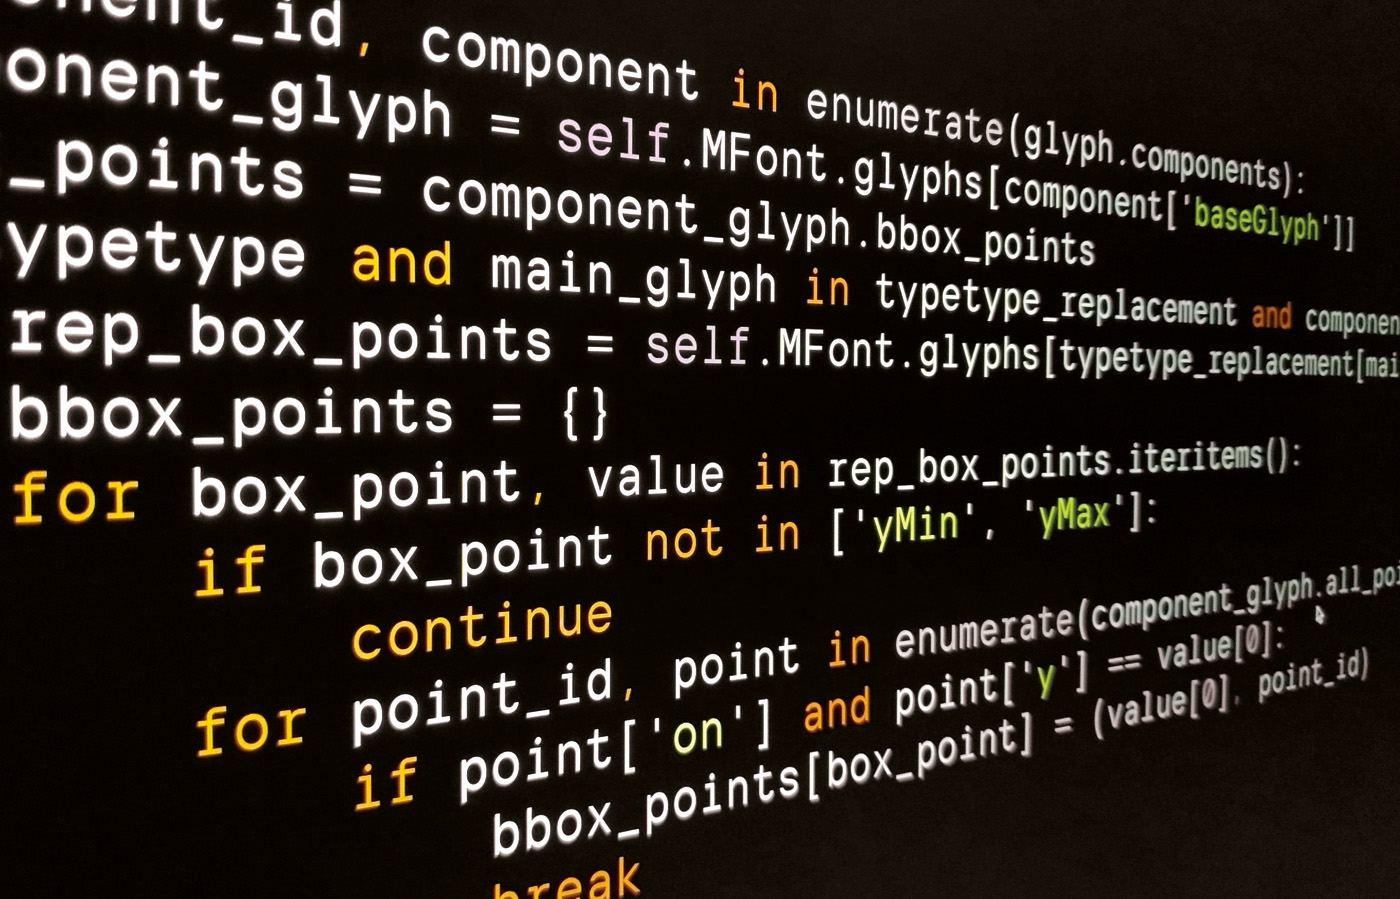
Another complex but interesting technical task within the framework of this project was the fact that the glyph names of the icons do not have a Unicode value, and therefore, when sorting the glyphs inside the font, they will fly apart in random order.
When we open the Glyphs panel, for example, in the usual Adobe Illustrator, we will see that some of the icons will be together, and some will be sorted randomly. Such a random approach is out of the question, so we are thinking about how to solve this problem.
Another problem is that in programs such as PowerPoint, glyphs without Unicode will simply not be displayed in the symbol adding panel, and they cannot be accessed from the keyboard.
So we ask our programmer to write a Unicode Filler script, that fills the selected cells with Unicode values from the free range of the standard while respecting a specific order.
So we keep our consistency for the icons when they are selected through the Glyphs panel in the Adobe products and we will also give the opportunity to select and add icons to the programs such as a PowerPoint. In addition, the icons can simply be copied from program to program, and this is already really cool!

Stage 5 — Creating a monospace family
From the very beginning, we wanted to create a monospace satellite font family for programmers that would complement the main one. We reviewed and analyzed the most popular monospaced fonts that are used to write code. We examined all the nuances and features of this type of fonts, and also consulted with different programmers.
Based on the results of the study, we compiled a summary table in which the values of the proportions of the “ideal” monospaced font were derived. In particular, we were interested in parameters such as width the em-square, the sizes of stems for a regular and bold weight, the technical configuration of line spacing, similar to the usual version of the font. The number of styles, as in the case with most analogs, was proposed to be limited to four.
After determining all the key ratios and metrics, we were very surprised that even the sizes of stems in regular and bold monospaced styles coincided with respect towards our primary font family. We considered this a good sign and started drawing the font in a 10×10 grid.
In the process, we preserved and carefully transposed into the “new reality” the main features of the characters in the basic font, namely its aperture (degree of openness/closedness of rounded signs), the degree of rounding of circles).
Due to the fact that the font is monospaced, that is, the width of the size of the em-square in all its characters is equal to one value (600 font units), we had a need to change the shape of some characters so that the set would look even and would not form “holes” and “sticky”.

For the black and white balance, we decided to bring back the visual compensators, which were abandoned in the main family. This will also add some character to the monospace font in addition to the correct black and white balance. In this case, this is more than appropriate.
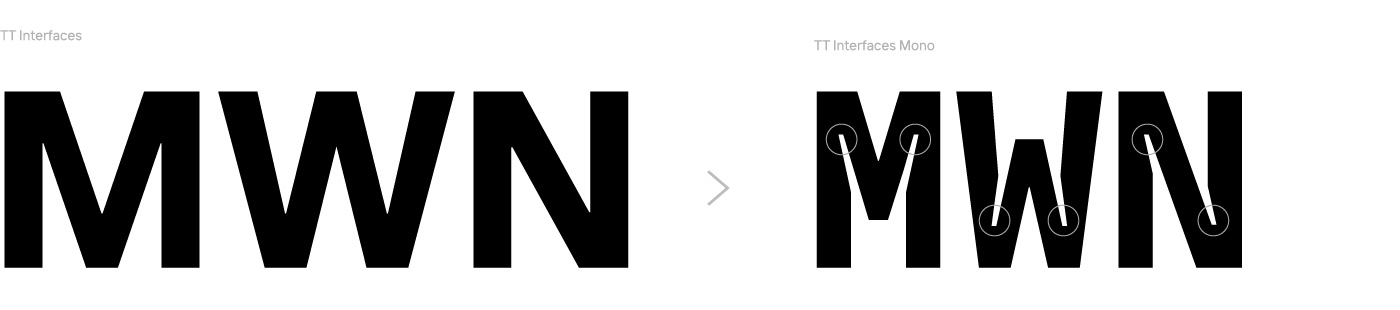
As a result, some letters turned out to be very wide (ш, щ, ж, m) and they are a “heavy” fit on the em-square (600 font units) in their natural form and in their proportions. So, in order that they can be read and not disrupt their form, we compensated the middle vertical stems.
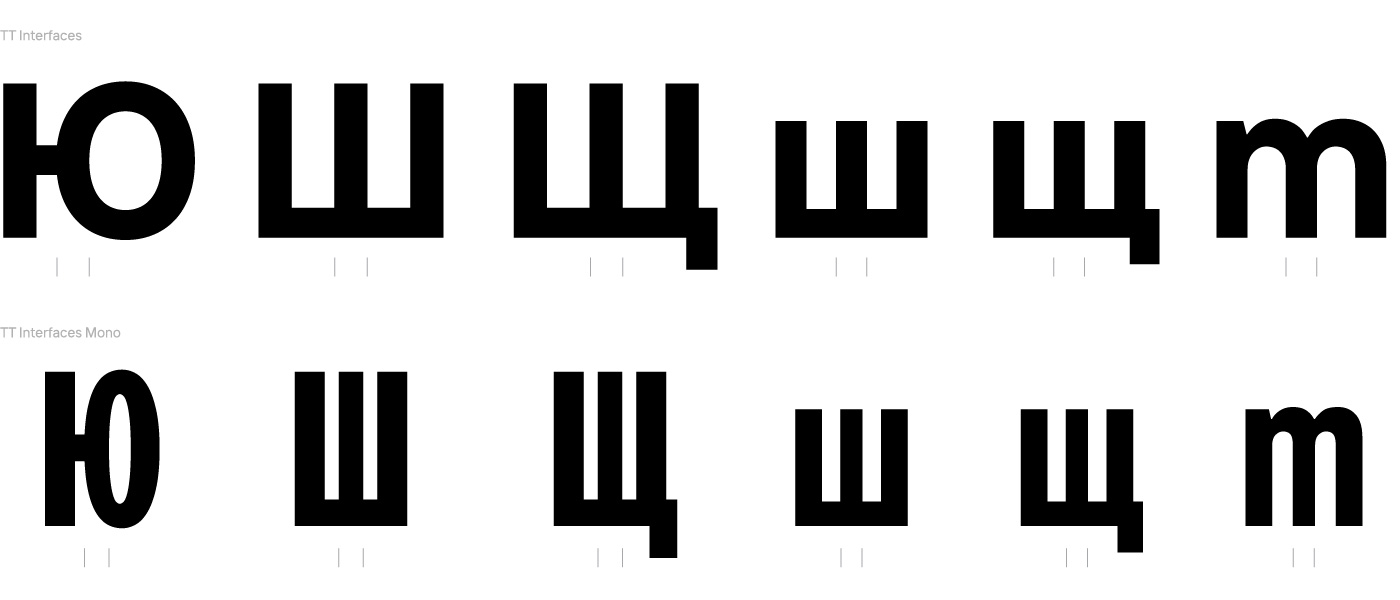
We continued to work on visual compensations and black and white the balance, and some glyphs changed a lot. Such deformation is not only aesthetic in nature but also gives the font its recognizable image and style.

We look at what the font looks like, make changes to the character fits and forms, strengthen the compensators since the font looks quite black.
Let’s talk a little about such a topic as the character composition in monospaced fonts. One way or another, its composition differs from the character composition of our main family. We conducted a small qualitative study on the subject of monospaced fonts, analyzed what we already have, what we need to get rid of, and what we need to add to the typeface.
We edit the encoding of the basic font of TT Interphases so that it turns into the desired encoding for TT Interphases Mono. We remove tabular figures and tabular currencies, now there is no need for them since the whole font is already monospaced anyway.
We also no longer need the icons that we created for the main family. We remove ligatures, since for programmers, in particular, their presence can pose a certain “danger” — the code should not replace several characters with one. Instead, we add special characters needed for programmers to code.
After testing the features, we realized that the Frac feature (responsible for fractions) does not work and we still need to think about its performance. Typically, such features are not enabled in such fonts, however, we decided to leave it in and began to fight over the logic of its functionality.
As a result, for the correct operation of Frac, we added a separate set of numerators and denominators with negative character fits, so that when combined with fraction, the em-square would be equal to 600 font units. It sounds complicated and incomprehensible, but in the end, it all worked.
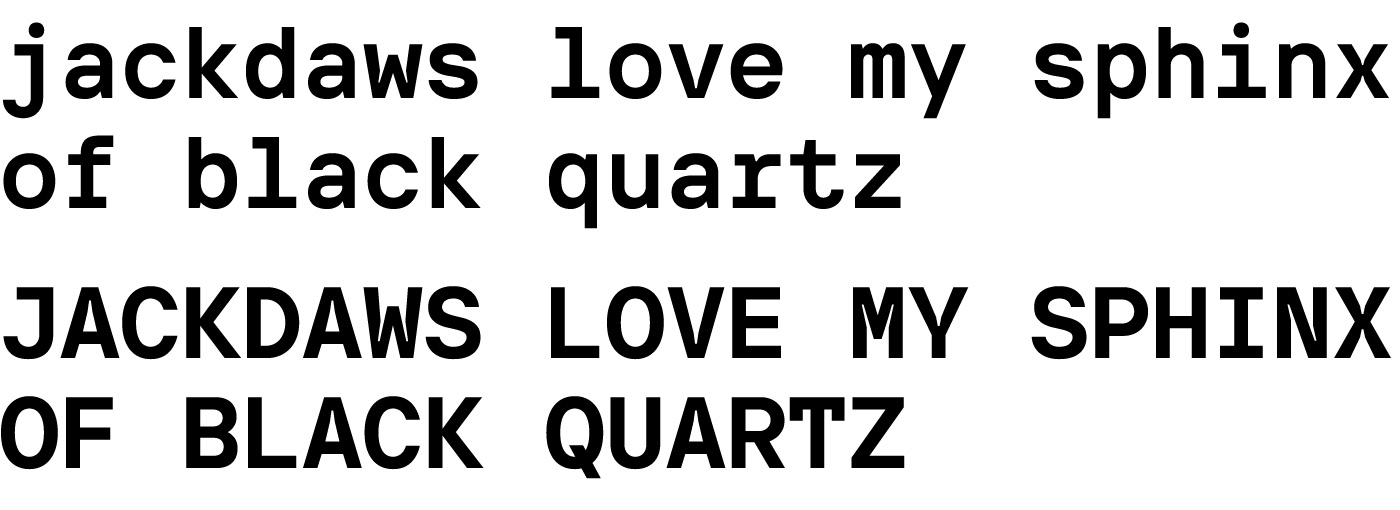
We ask our colleague to send a real piece of code, we recreate the layout and test the result. We tested the font on a dark background, as programmers usually use it to write code.
The result leaves us happy. The letter “o” is not confused with the number “0”, “l” with “1”, and everything is distinguishable and readable.
Now we move on to the oblique monospace styles. We looked at and analyzed the existing analogs and, as usual, compiled a table that took into account the main proportions as well as the angle of inclination. As a result of the study, it became clear that the “ideal” angle of inclination is 11 degrees.
When working on obliques, we decide to fool around a little and draw sketches in which we try different strange outlandish forms of characters.
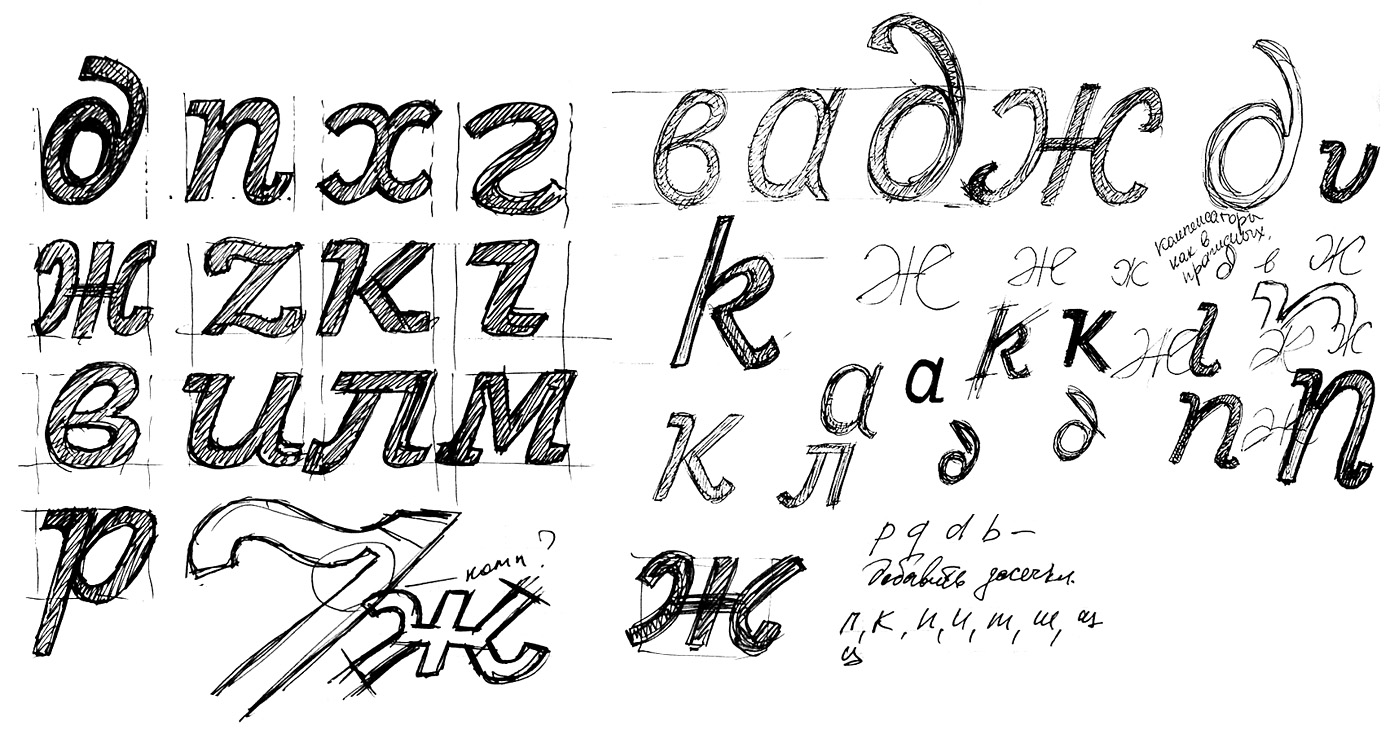
In the process of working on the monospace family, we decide to make not just an oblique, but an italic. This is followed by a new stage of sketches. We wanted to give the italics its own character, but at the same time to maintain neutrality. As a result, we decided to abandon the very extreme forms in favor of cleaner and more readable characters.

We changed some forms of letters that are traditionally used in italics, which gives the inclined styles a feel of being “handwritten”.

Stage 6 — Creating hinting
Hinting is a complex technical process of optimizing the font pattern for some types of rasterizers (screens, browsers, programs). In our company, hinting is a separate technological process that takes a lot of time.
Initially, not all styles were ready to start to create hinting. We only had five out of nine weights: Black, Regular, ExtraLight, Light and Thin. While the rest of the styles were being completed — icons were being added and technicalities were being finished, our hinting guru Victor decided to start hinting with from the regular style and go down by weights. That is, after Regular, the hinting would be sent off into the lighter weight styles Light, ExtraLight and Thin.
Why are intermediate faces needed when you are setting up hinting in a font family?
Typically, when hinting fonts at TypeType, we use the Microsoft hinting tool called Visual TrueType (hereinafter VTT). But to speed up and improve work on hinting, we also use our own additional software developed in our studio.
One of the key functions of this software is to transfer hinting between weights in glyph by glyph. The closer the fonts’ shapes are to each other (in this case, their thicknesses), the fewer errors occur in the process of transferring hinting information, which means that less manual work will be required to make corrections.
Speaking about our software, this script works on an algorithm that searches for similar points in the font of the next degree of thickness and accurately transfers the hinting. The contours cannot be completely identical, so errors occur in 10–30% of cases and they have to be corrected by hand. But this still reduces the time spent on hinting by almost 5 times.
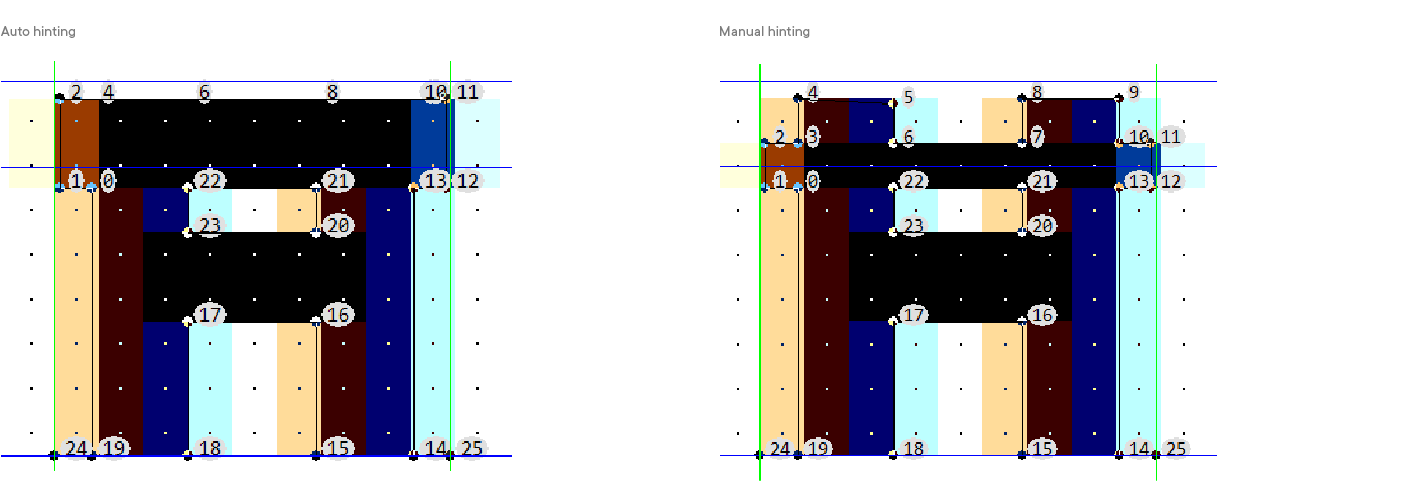
So, the regular style was the first we worked with. Automatic hinting was performed using VTT. With the help of this tool provisional markings were put down and groups of characters and reference values for them were identified. Groups of reference values are the reference values for glyphs, the contours of which must be consistent with each other both in width and in height. Consequently, the contours of glyphs placed in one group will have common characteristics.
In addition to the four standard groups, which are defined by automatic partition — UpperCase, LowerCase, Figure, and Other — we added five more: Superior, OldStyle, Icon, Balls, Numr. Subsequently, in the process of working with custom groups, their specific reference values were determined and entered manually. They were then used for hinting of the characters included in these groups.
In total, about 60 values were additionally defined in each of the styles, and the bolder the font becomes, the more necessary it is to use a variety of values to be able to control the stems more flexibly.
After using auto-hinting and before starting manual editing of the font pixel map, our own developments were additionally applied. For example, hinting of composite characters.
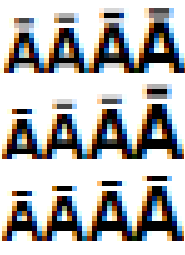
The above image shows the Amacron character in a size of 12 to 15 pixels at the 72-dpi resolution using the DirectWrite type rasterization in the Bold style. Notice how the Macron diacritical mark is rasterized.
On the first line — the rasterization of the character before hinting;
On the second — rasterization after auto-hinting;
On the third — rasterization after applying scripts of our own design.
After all the manipulations for preparing the font, we finally proceed to hinting itself.
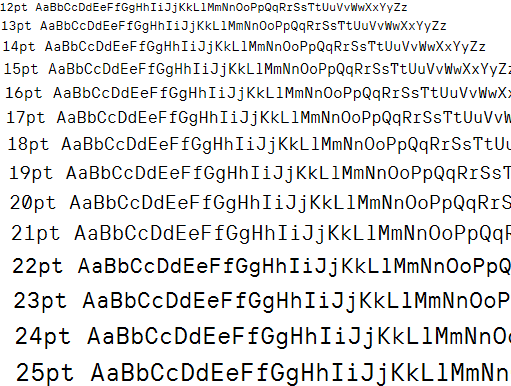
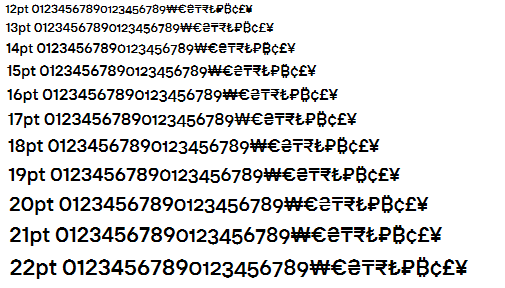
The image below shows the TT Interphases Mono Regular style before hinting. You may notice that at different sizes there is a problem with the consistency of pixel thickness both among the stems of one glyph and between different ones.
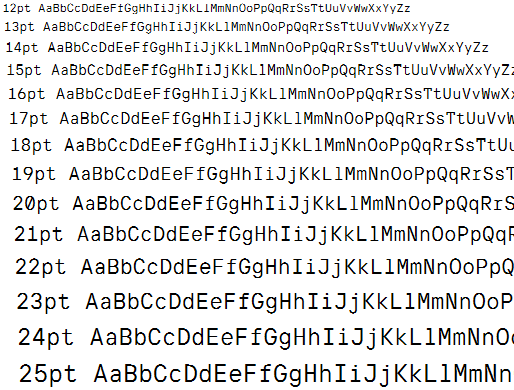
To solve this problem, pixel transitions of thicknesses were determined for uniform growth of the stem with its increasing size. Consistency among all stems in the font has been restored, the contours look uniform.
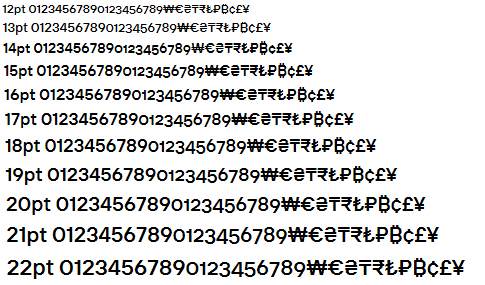
The same is shown for the figures and their old-style variants in TT Interphases DemiBold, where lowercase ones begin to get thinner too early as compared to regular versions.
Of course, it needs to be understood that the main task of hinting is the readability of the font and to achieve this goal you have to neglect the consistency of the stems because of the lack of white space.
For example, in the image below, on the right, it shows that at 12,13,15 and greater point sizes all stems are of equal thickness, but in size 14 due to the lack of space in the glyphs euro, hryvnia, and rupees the horizontals we deliberately made thinner.
Otherwise, if the contours are not distorted, the situation that can be seen looking at the top of the hryvnia character in the 14-point size in the same picture on the right could have happened again.
In thin styles, the situation is a little different: it is necessary, in addition to consistency, to also restore the thickness of the stems. In the picture below it shows that some of the stems become so thin that they disappear altogether.

It is important to understand that in all the “After hinting”-like pictures shown above you actually see the result after all the work done with the contours of each glyph: matching thicknesses, correcting various distortions and irregularities, controlling the position of strokes and restoration of readability.
For example, for readability of the Hbar sign in TT Interphases ExtraBold, the upper bar pixels were manually shifted. Such operations are called deltas.
Exactly the same actions were undertaken with currency. For each style of the TT Interphases family, it took about 170 deltas, which, in total, for all 18 fonts of the main family and 4 fonts of the monospace family, amounts to the value of 3740 deltas. It should be understood that the thinner the outline, the more likely it will require fewer deltas.
In general, the fewer deltas there are, the better it is for everyone because each such delta instruction will occupy a separate byte in the font file, and often for many mass services and sites this might be super important.
Also, as an example, in the capital Cyrillic letter “И” in TT Interphases Medium Italic, we were not satisfied with the thickness of the diagonal: at small sizes, it became too thin.
It can also be noted that, in some symbols, the positions of the components have been adjusted. A component in a font is a frequently used outline, which we only refer to in the glyphs where we use it. The component is taken from the main contour as a reference to it, so if you suddenly change the main contour, the component in the other characters where it is used will also change.
Also, the final font file itself will weigh several times less, since the space inside the font file is saved thanks to the absence of unnecessary information.
For example, in the “billiard ball” character 0x2473, the zero-component has been shifted by one font unit (a very small value) with respect to the two-component. Because of that, in some sizes, the zero-component was one whole pixel shorter (which is already a very big value).
It is noteworthy that we were able to reduce the size of the font files with manual hinting by an average of 18% compared to automatic hinting in TT Interphases, and in the case of the TT Interphases Mono by 5%. Perhaps this will please the users of our fonts who actively use them on the web.
Stage 7 — Creating variable fonts
First, we open all the styles that will form the basis of our variable font. The optimal number of masters to create a variable font ranges from three to five. To create the TT Interphases Variable, we select four main masters: thin, regular, bold, black.
We work with FontInfo and add masters by copying. We adjust the weight value and edit the font name so that it displays correctly in the software.
We add the needed variation axis — in our case, Weight. We add all other styles as instances and write after the = the thicknesses of the stems of our fonts. Once the tabs Names, Axes, Masters and Instances are completed correctly, we can proceed to contours compatibility check.
If our masters are compatible, then in the Layers panel they will all be painted in green. Sometimes it is necessary to manually set the starting points and to check the directions of the contours since their mismatch also leads to distortion in interpolation.
In the case of TT Interphases, we need to add three points to the letter “M” in the black style. To do this, we select each point in turn and press Ctrl + D, or right-click the mouse and from there + Duplicate. After adding the missing points, we click Match Masters and check the variability on the Instance layer or on the Preview panel.
And now all the verification settings are over, and we can, with a clear conscience, start testing the variable font.
Conclusion
Thank you for taking the time to read the story of the TT Interphases font family. We tried to tell you in as much detail as possible about the internal kitchen of the type design studio and show you all the stages of creating a complex typeface.

TT Interphases Team
A team of eight people worked on the creation of the TT Interphases font family, which included font designers, font engineers, and managers. The full list of project participants:
Ivan Gladkikh — head of the project
Irina Tatarskaya — project manager
Pavel Emelyanov — art director, author of the study and the basic font
Marina Khodak — senior font designer, technical project manager
Ksenia Karataeva — font designer, author of the monospace subfamily
Nadezhda Polomoshnova — font designer, author of the icons
Victor Rubenko — technical engineer, programmer, hinting specialist, and just a villain
Nadyr Rakhimov — font designer, technical engineer
Yuri Nakonechny — technical engineer, debug tester
TT Interphases useful links
PDF specimen | Graphic presentation | Try&Buy TT Interphases
Feedback
If you have any questions, just write to us at marketing@typetype.org and we will be happy to answer them.